Intro
We’ll look today at how we can pass Domo data in to third party applications using Dataset Alerts & Webhooks.
Specifically, we’ll look at how we can do this in Slack, where we can trigger a Slack workflow to automatically post a message in to any given Slack channel that contains data from a Domo dataset. We’ll use dataset alerts to initiate the trigger and subsequently a Webhook to send the payload of data from Domo to Slack.
This can be a useful mechanism to keep your teams on top of data that requires an action it happens. For example, if a support ticket is raised by one of your customers and that record lands in Domo, you can have a notification posted to Slack to inform the account team. Or, if a new lead is generated from an inbound source, you can notify the right sales team in Slack.
It’s something we use here at Domo regularly for important items that require immediate action.
So before we dive in, here’s a quick 101 on webhooks, in case this is a new domain to you, if not, feel free to skip ahead.
What are Webhooks?
Webhooks are a way for one application to send a message or data to another application automatically, without the need for the receiving application to constantly poll for new data. They are a simple and efficient way to integrate different applications and automate certain tasks.
Webhooks are based on the concept of HTTP callbacks, which are also known as “HTTP push APIs.” When an event occurs in the sending application, it sends an HTTP request to a specified URL (known as a “webhook URL”) in the receiving application. The receiving application can then process the data included in the request, and take any necessary actions.
Webhooks are often used for real-time notifications, such as sending alerts or updates from one application to another. For example, a payment processing application might use webhooks to send a notification to an e-commerce application when a customer’s payment is processed.
One of the key benefits of webhooks is that they allow applications to work together seamlessly, without the need for additional integrations or middleware. They are also easy to set up and use, and can be used to automate a wide variety of tasks.
In short, webhooks are a simple and efficient way to send data from one application to another, and can be used to automate a wide range of tasks and notifications.
The How
For my example, it’s going to be something pretty light hearted, I have a JSON No-Code connector set up in Domo that populates each day with a new ‘fact of the day’. We’re going to post the fact of the day to a slack channel, straight after it’s received in Domo.
Set up the Dataset Alert in Domo
The first thing we need to do is to configure a dataset based alert in Domo, for this example we’re creating an alert on the dataset itself, not on a card. Navigate to your dataset and click on the ‘Alerts’ tab, followed by ‘New Alert’, you should see a pop-up like the image below:
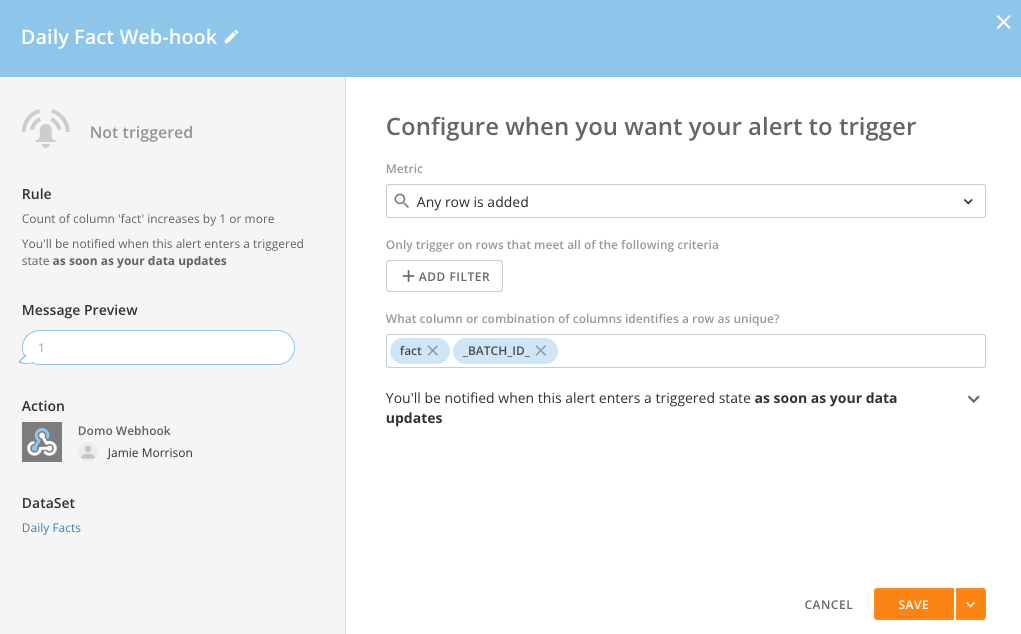
Here we can define the logic that will trigger the alert, in my example, this connector is set to ‘replace’ and will pull 1 row of data each time (LIMIT=1), so I can say the alert should trigger when ‘Any row is added’ to the dataset. You can also define the logic to identify a row as unique, in my case the Batch ID is sufficient, but you can add a composite key of multiple columns if you wish.
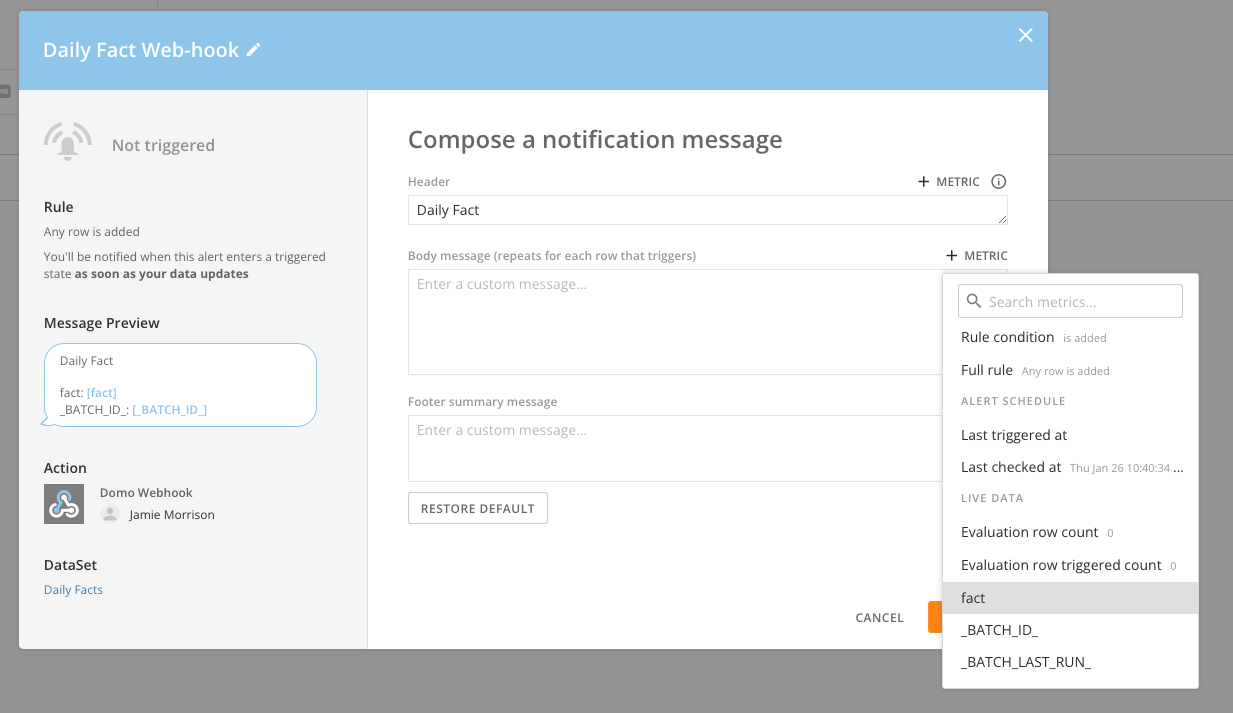
Click ‘Next’ to configure the body of your alert; here we can specify the content of our alert, in my case this is simply the column that contains the fact, aptly named ‘fact’, however you are able to construct complex messages here, which pull data from multiple columns dynamically.
Once done, click next and then add a ‘Webhook Action’ to the alert, this will send the data to Slack. Again, you can configure this by customising the the content of the ‘message’.
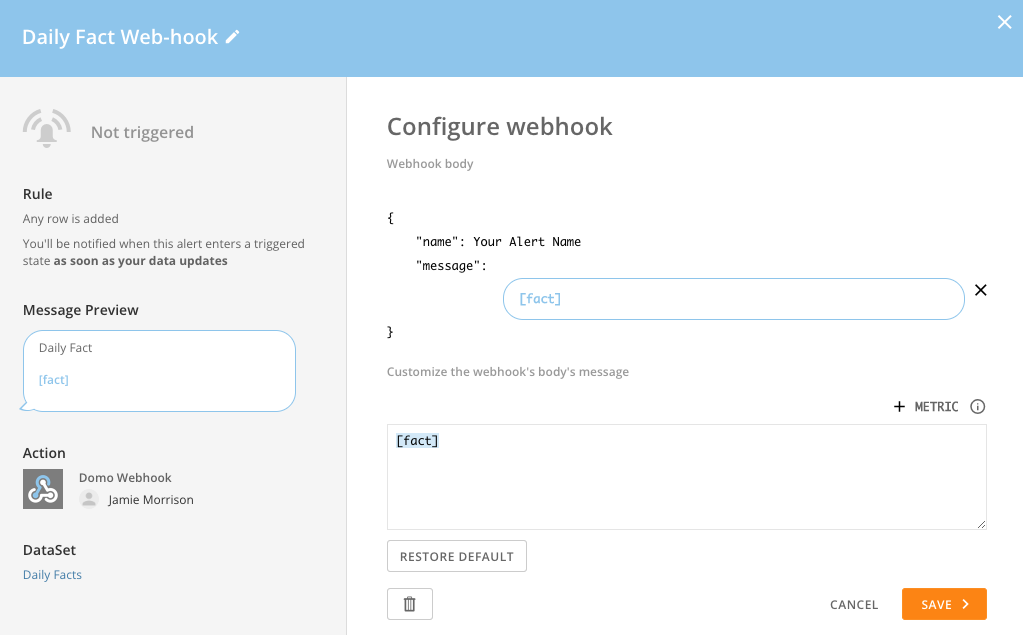
At this point, you should see an empty URL parameter while configuring your Webhook settings, we’ll pause working in Domo for now & switch over to Slack to generate that URL required in Domo.
Set up the Slack Workflow
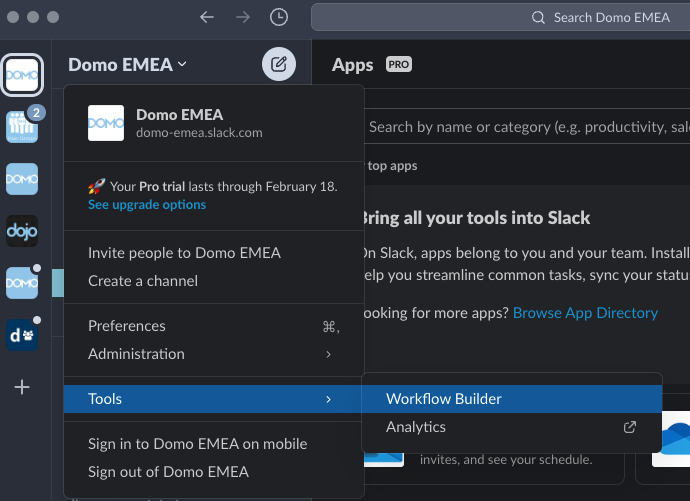
From your Slack window, let’s create a new workflow; navigate to your space settings by clicking on the title of the Slack space, in my case it’s ‘Domo EMEA’. Then ‘Tools’ -> ‘Workflow Builder’.
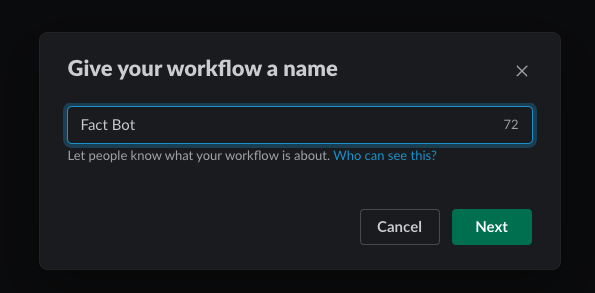
Give your workflow a name.
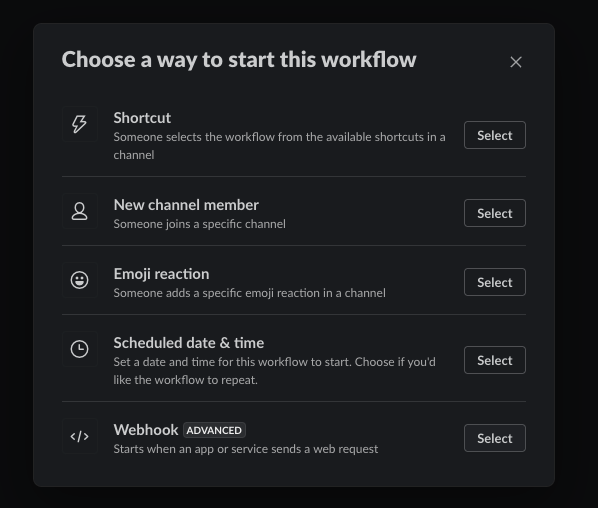
The select ‘Webhook’ when prompted to choose a method to start the workflow.
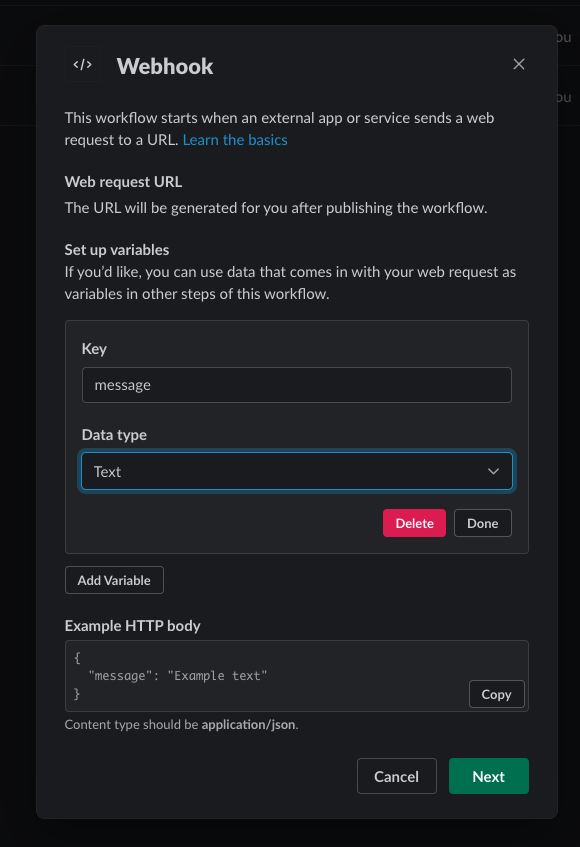
Here we want to add a new variable, if you recall in Domo when we created the Webhook action, the key in the JSON object where we had our data was named ‘message’ so we’ll call our variable in Slack ‘message’ to match, and it’s a data type of text. The example HTTP body towards the bottom now looks similar to what Domo had generated, so far so good.
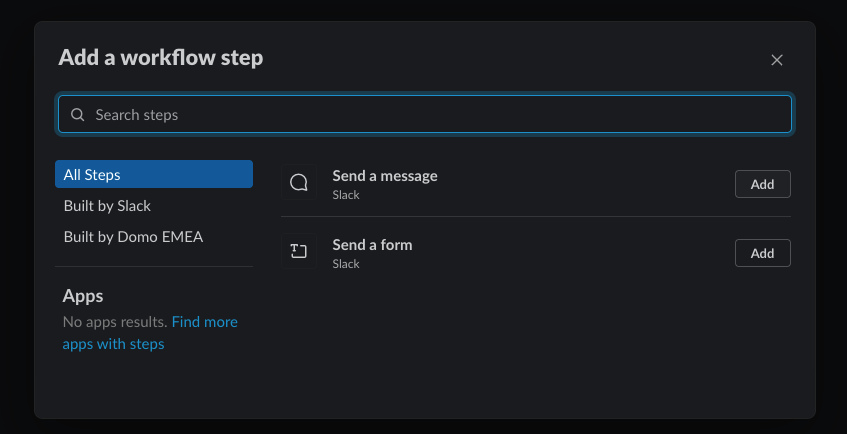
Next we need to add a step to the workflow, we want to send the received data to a channel in Slack, so we’ll select ‘Send a message’.
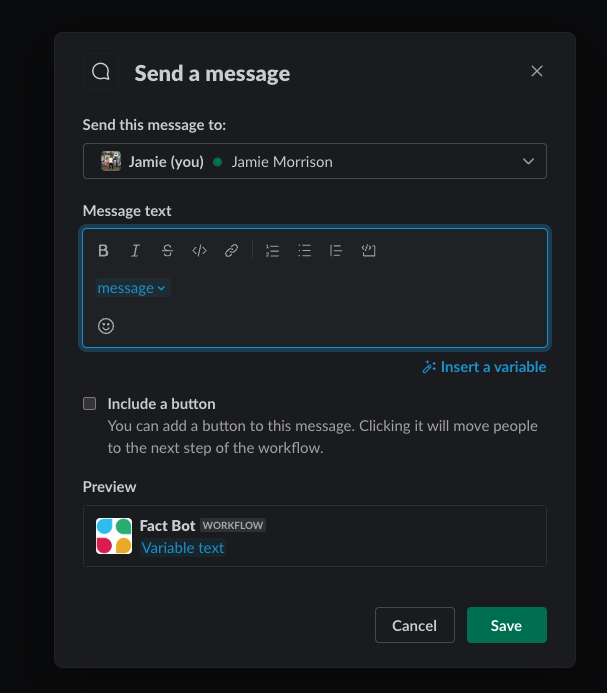
This step will dictate where the Domo data will be sent within Slack. In most cases this will be a channel, but I’ve chosen myself, to test this out. You can always go back to edit the workflow to add a channel once you’ve confirmed it works.
Add in the variable you just created to the ‘Message Text’ box, it should appear in blue. You can also change the icon if you wish in the settings for the workflow.
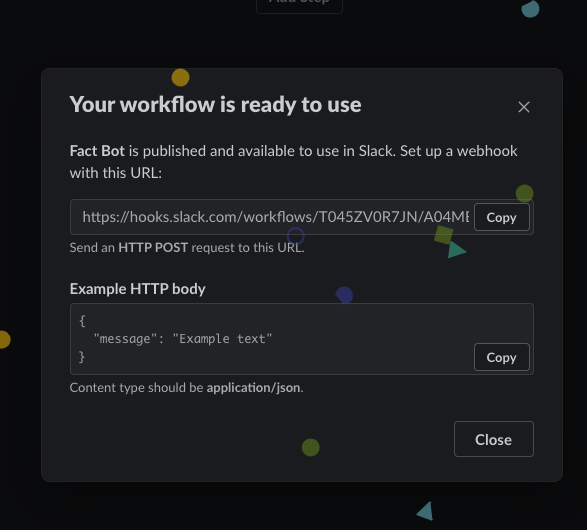
Once you hit save, you’re done configuring your workflow in Slack and you should be presented with a URL, hit the copy button and switch back to your Alert in Domo.
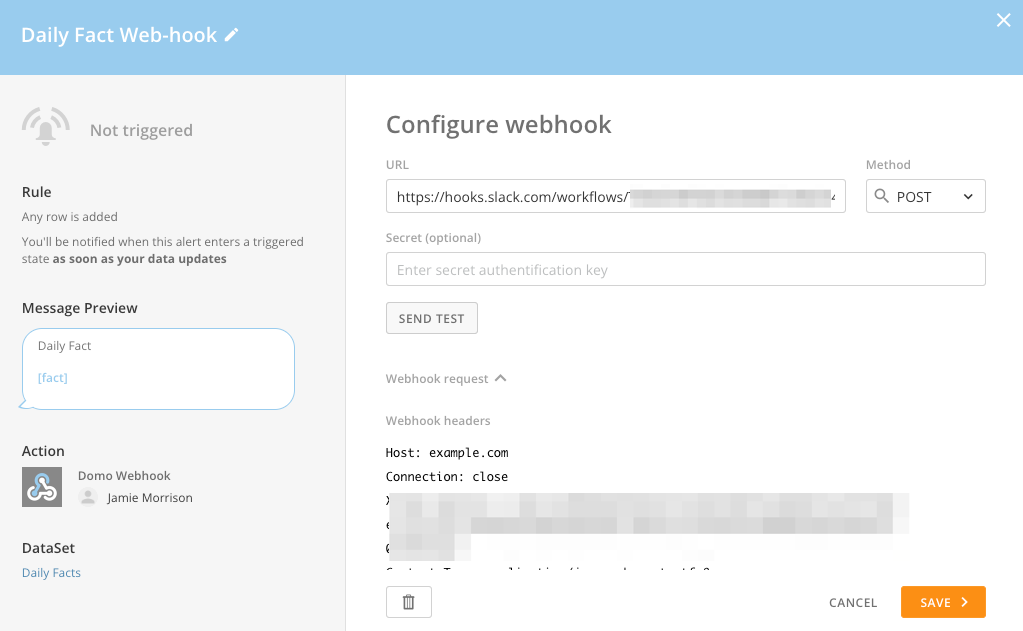
Paste in the Slack generated URL to the Domo URL field. You can hit the test button to have Domo send some test data to Slack.
Testing the Webhook
If you’ve stuck within the steps this far, you should now be receiving your Domo data in Slack when you hit the ‘Send Test’ button.
Now, when your Domo dataset updates and fulfills the trigger criteria, the alert will post the message to your Slack workflow, into your chosen channel. You can se this working in the .gif below…
Each time I run the connector to get new data, it triggers the alert and posts the message to Slack.