Intro
It’s been a while since my last post here, so it’s good to be back with some new platform features and how we can apply them to some ideas and use-cases.
In this post we’ll be looking at how we can automate the process of emailing potential customers who abandon carts filled with items on e-commerce websites. It’s a pretty novel use-case, made for fun to demo how things work with one of Domos new features. If you managed to catch the London leg of the Domo Connections tour, this was the same demo that I showed during my presentation there.
We’ll be seeing some new platform features in this post, specifically Workflows. This is, in my opinion, a pretty exciting new feature being introduced to the platform with a lot of interoperability and integration as we’ll hopefully see.
Theres a form further down this post where you can enter some information to kick off an event driven workflow, then see the results within a few seconds!
At a high level Workflows is a new platform feature focussed on allowing you to create and to build automations for business processes, this 2 minute video sums things up a little better than I can:
We’ll be using the following components to do this:
- Domo Workflows & Code Engine
- ChatGPT
So, lets get in to it, theres quite a lot to cover here….
Context
You’re lying to yourself if you think you’ve not done this before, filled your cart with some items on an e-commerce site, then, just before handing over your hard earned cash you think twice about it and close your browser tab, leaving your items in digital limbo.
This is a huge issue in the e-commerce space, up to around 70% of carts are abandoned before the purchase step, leaving large amounts of potentially lost revenue for retailers.
If you’re on the consumer side and you have an account registered with the website where the cart was left, it’s likely you’ve experienced at some point a follow up email from the retailer, perhaps a few days later reminding you of your mistake not to purchase those items and that you should return immediately to complete the transaction.
I think in reality this is often a system built in to e-commerce platforms, Shopify, WooCommerce and so on have these as modules you can use to automate the process. So is this a somewhat redundant post by replicating the same process in Domo with Workflows? Maybe, but we’ll add a spin on to it by doing what we’re all more familiar with by now; that is shoehorning ChatGPT in to any and all processes.
So imagine we have all of the information collected from our e-commerce platform, data on all of the abandoned carts; we’re likely to know the person / user who left the cart and the items they left. we can probably also track when it was abandoned and what the total amount of potential lost revenue is. So, we have a decent amount of information to try and create something personalised for our customers. Enter ChatGPT. Using a function that we can re-use and call from within our Workflow, we can use an API call to have ChatGPT generate a tailored, personalised text to be used in an email, using the information about the products that our customers have left in their carts to attempt to entice them to return to our website.
Process
So, we have the use-case and we have Workflows, let’s build it.
This is broadly what the process flow will look like…
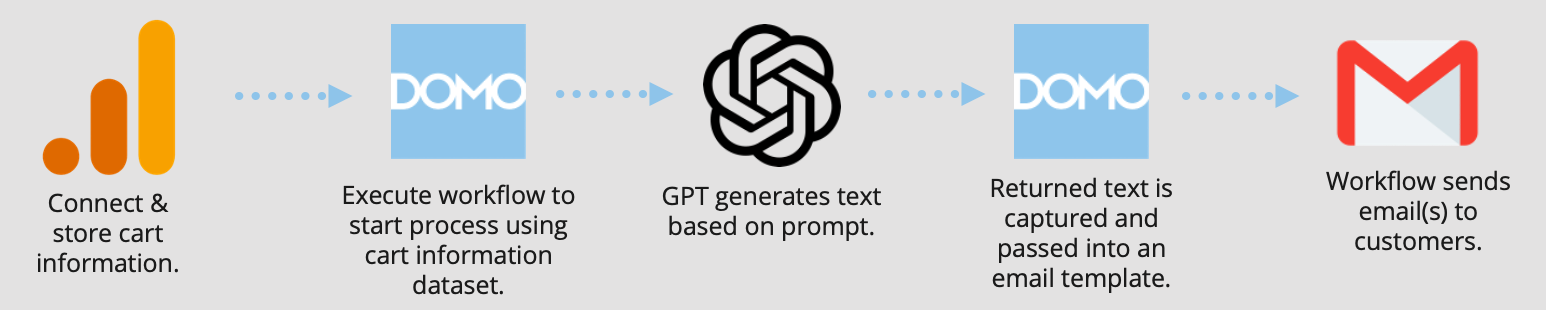
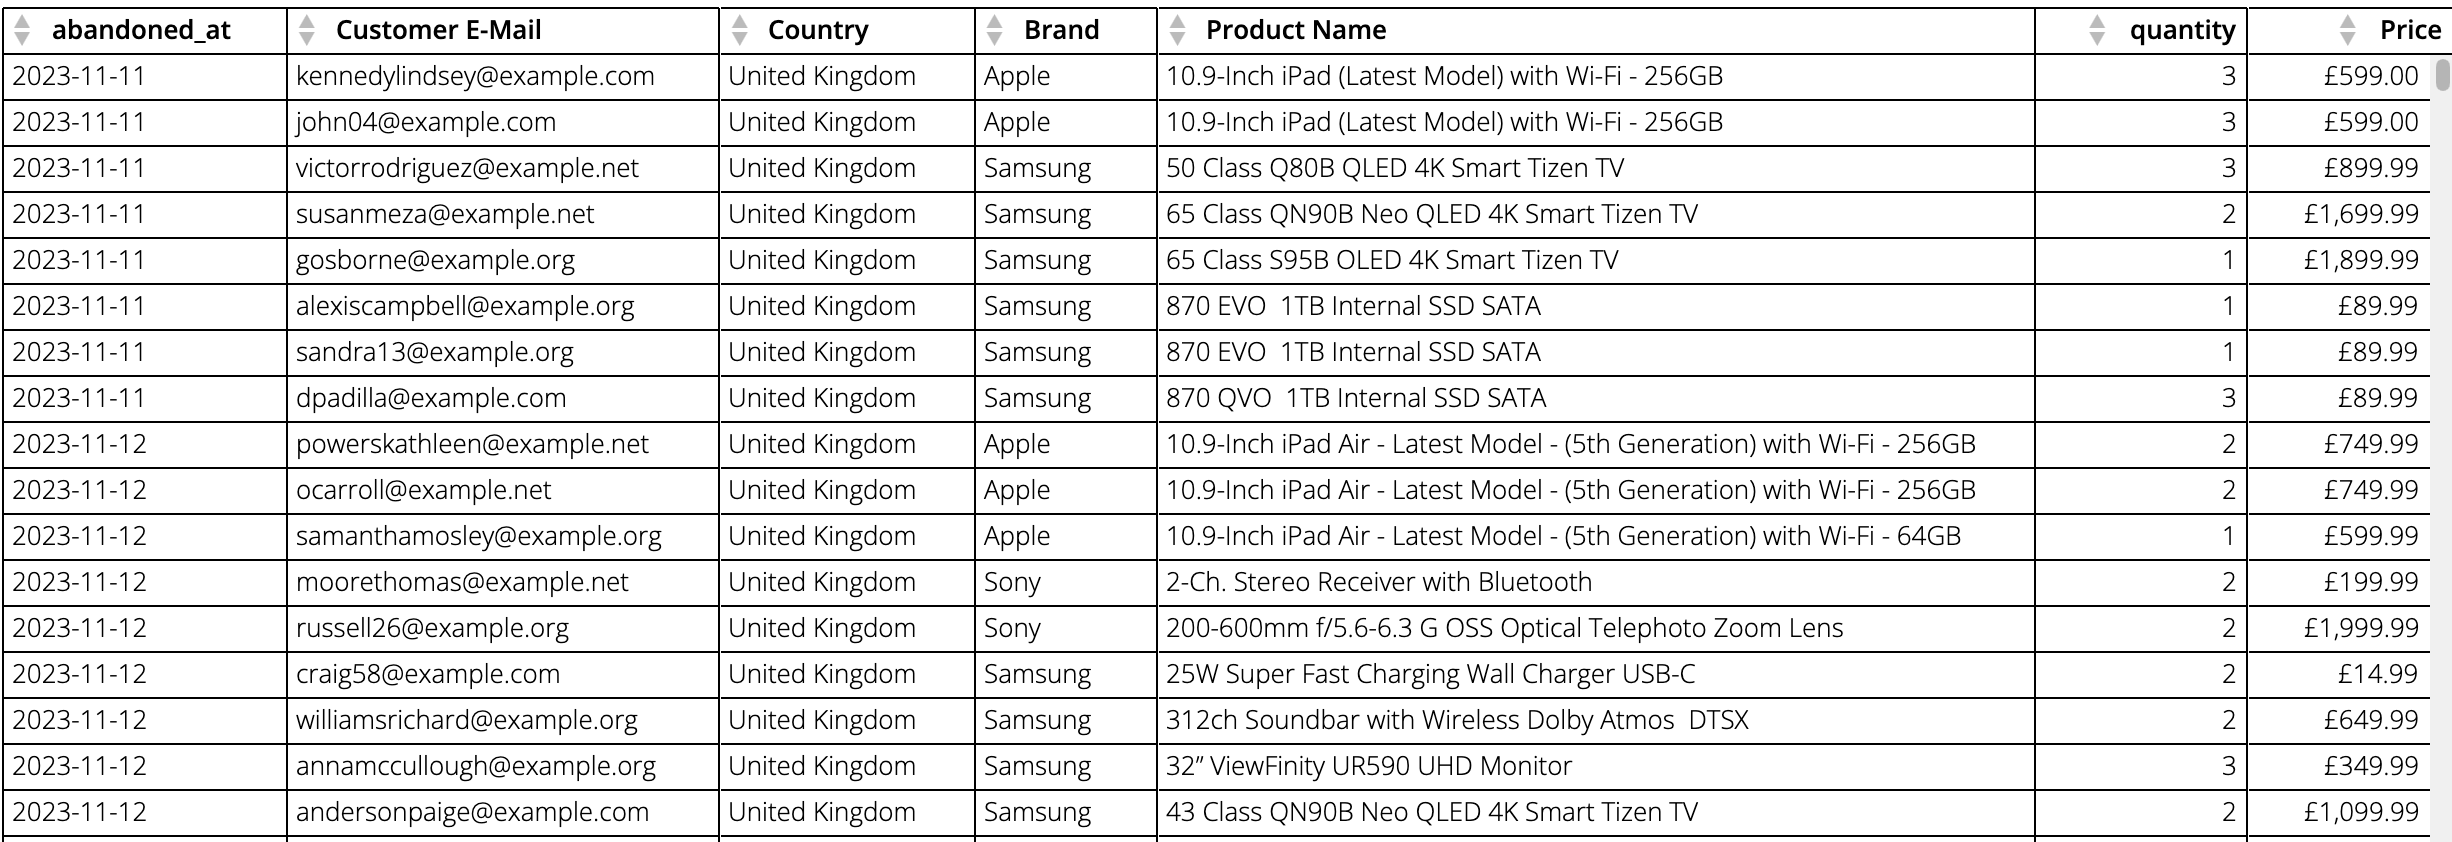
This is the dataset we’ll be working with, synthetic data of course, although the product names are real.
Before we piece together the workflow to carry out the steps in the image above, we can create a custom function that we’ll call from within the workflow, specifically the GPT API call to generate the text for our email.
We can create our functions in Code Engine, this is a Domo native runtime environment supporting JavaScript or Python. The nice thing with Code Engine is that while it allows you to write code to interface with Domo native components, like data-flows, datasets, people etc. It also permits you to interface with external tools and platforms, and that’s exactly what we’ll be doing with our function to call ChatGPT. We can develop and test our functions in Code Engine in isolation from a workflow, then when we’re happy with them we can deploy them to be used in the workflow itself.
Below is the code for the code engine function that makes the call to GPT, i’ve given my best shot here at a prompt, this is really what dictates the response and our email, I found myself coming back 2 or 3 times to add additional context to it to get a better a result made easier by the built in version control.
Fairly straightforward, we’re doing an API call using the standard requests library.
| |
In terms of what it looks like to test this function within code engine, you can check out the .gif below…
Ok, so we’ve created and deployed a code engine function to generate the personalised email text, next we can reference and use it in a workflow.
Building the Workflow
I won’t delve deeply into all the possibilities that workflows can offer; this post is lengthy enough as it is. Althughn I will likely be posting more workflow related posts in the future.
At a very high level, workflows includes a series of out-of-the-box functions and tasks, functions to query a dataset, manipulate data, start a dataflow, email a user etc. Workflows also allows you to incorporate custom functions, as demonstrated in this example with the API call to ChatGPT which is not something provided ‘out of the box’. When building our workflow process flows we can include elements like conditional logic, enabling decisions based on data or human interactions sent via email notifications. The range of possibilities is quite extensive.
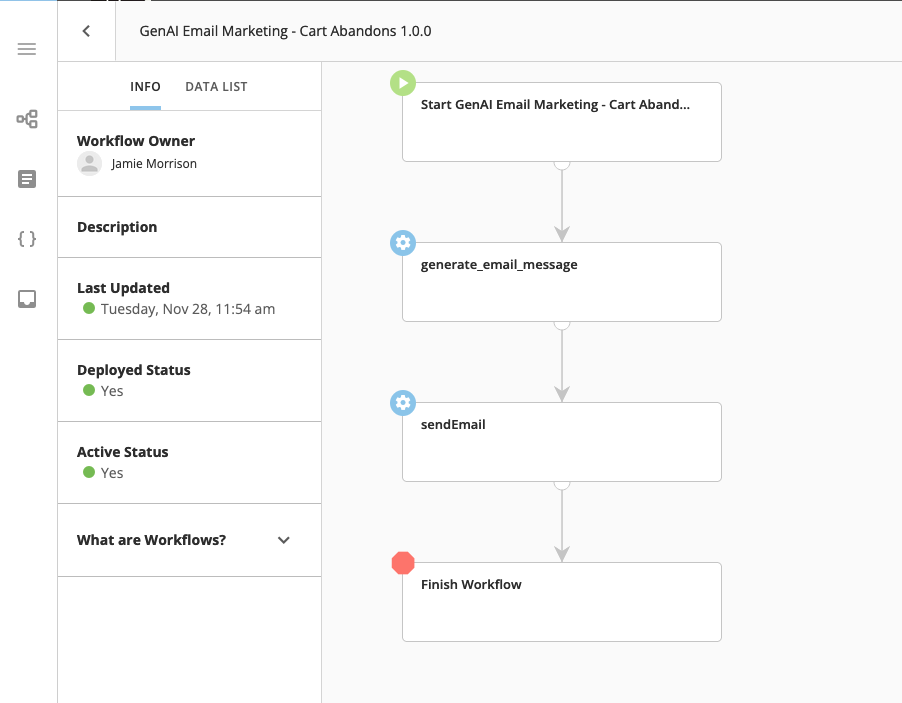
The Workflow in this example is actually incredibly straightforward, being only 2 steps or ‘service tasks’ as they are in the Workflows nomenclature, quite an anti-climax. One to call our GPT function, and one to take the returned text and send it in an email.
It looks something like the image below…
There are some parallels with workflows and Magic ETL, insofar as they both offer a no/low code drag and drop interface, with a set of pre-built tiles and functions to use, I would say though that workflows goes a little deeper. You’re able to see and modify the underlying code powering the tiles that you drag on to the canvas, as well as create your own.
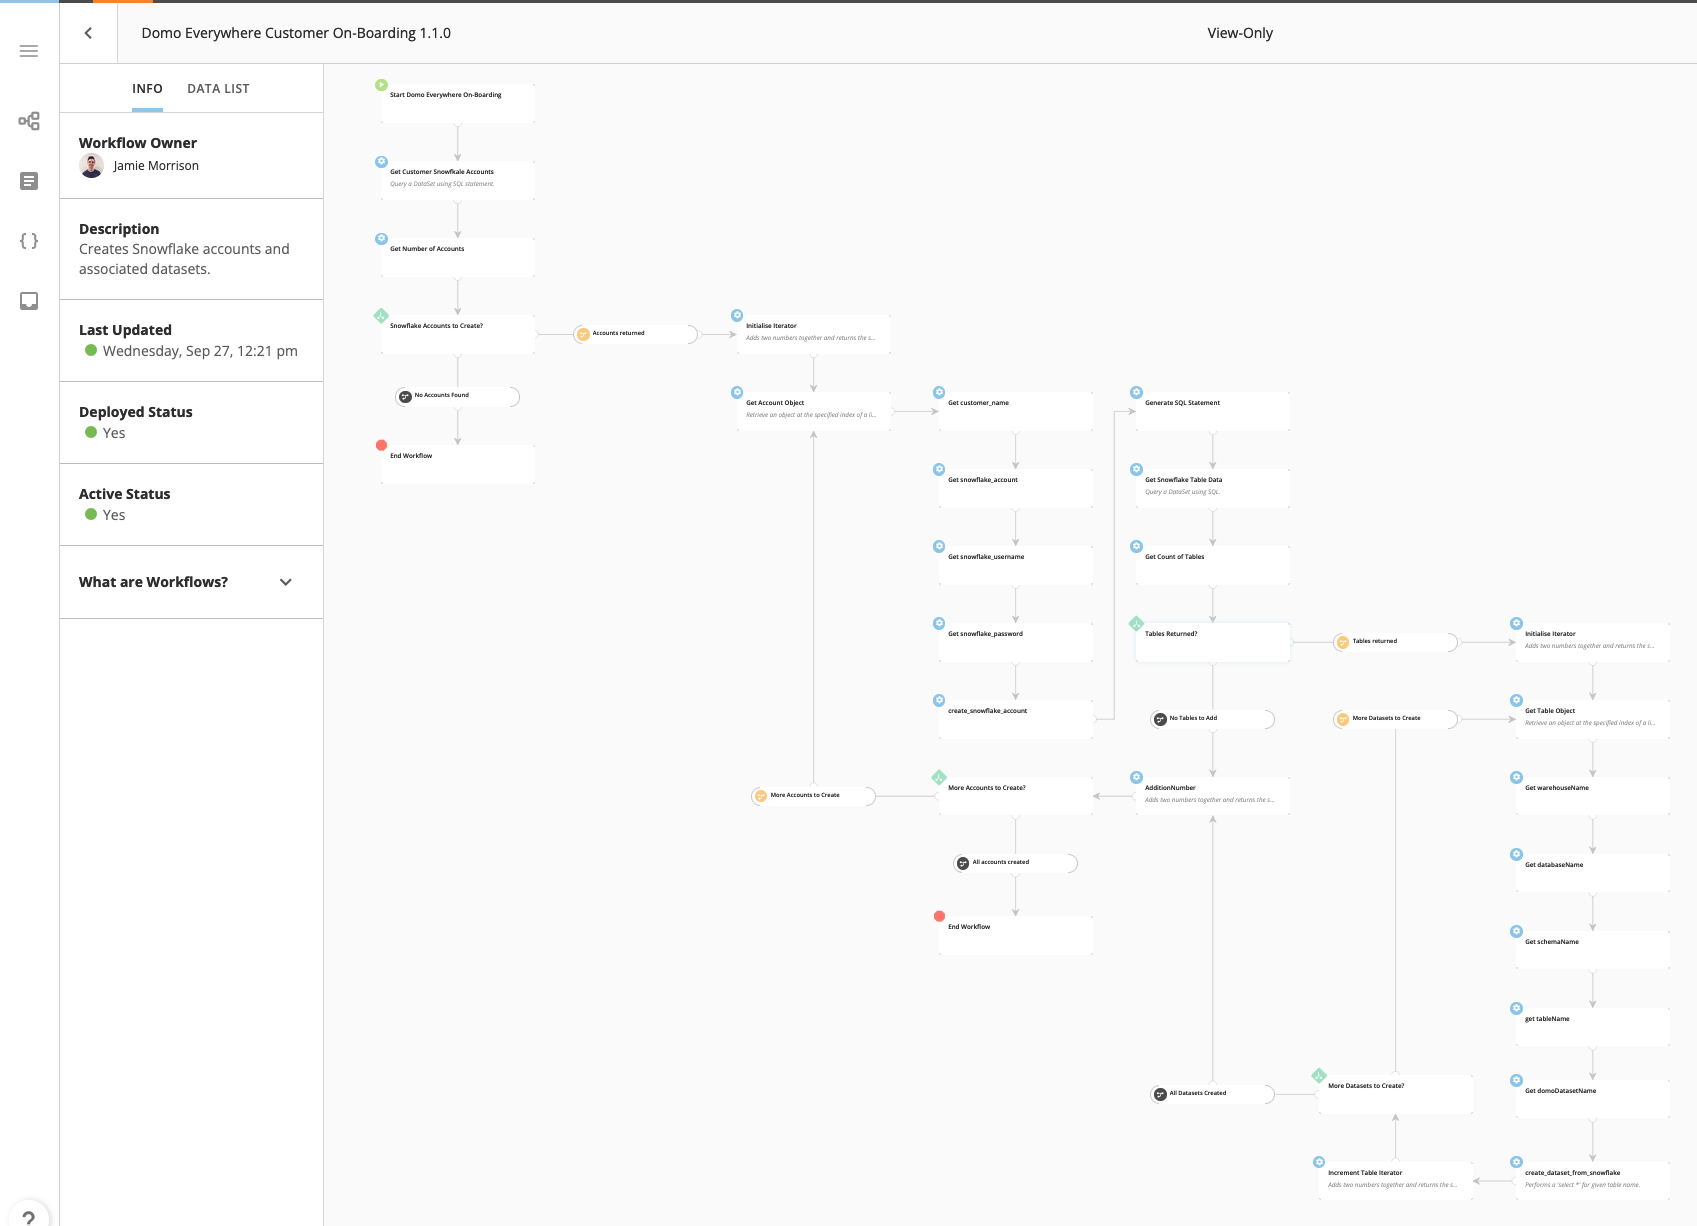
As I mentioned, I’m showing a very simple example of a workflow in this post, they can get much more complex than this, to give an idea here is another (unrelated) workflow I created a while back that has some loops and decision logic…
Demo
If you’ve read any of my other posts on this site, you will have seen that I typicalIy try to embed the actual Domo content so that you can see it and use it yourself, with a workflow it’s not really possible as there’s no visual component to it like a chart or dashboard. So, i’ve had to get a little creative to try and let you see it in action. You’ll see below a form with 3 input fields. If you fill this in, it will kick off the Workflow we’ve taslked through in this post, so that you can see the outcome (and hopefully speed at which they run)
The email address you enter in the form is where it will be sent, so use your own if you’d like to see the outcome, you can enter any name and product you like, so get creative. You can also run this as many times as you like if you’d like to try out different products to see different results.
I feel like I should add in a short disclaimer; the email address entered below will be logged to a Domo dataset which only I have access to. I truly have no interest in seeing your email address, rest assured it will not be used in anyway other than to have the workflow send you the outcome of the GPT function. Frankly, I don’t have the time to do anything with it, feel free to enter a fake name along with it.
Summary
OK, so while this wasn’t a step by step guide on how to build a workflows, maybe that will be a follow up post, I’ve tried to outline the steps you might take to build something like this out and how we can begin to automate both internal and external processes.
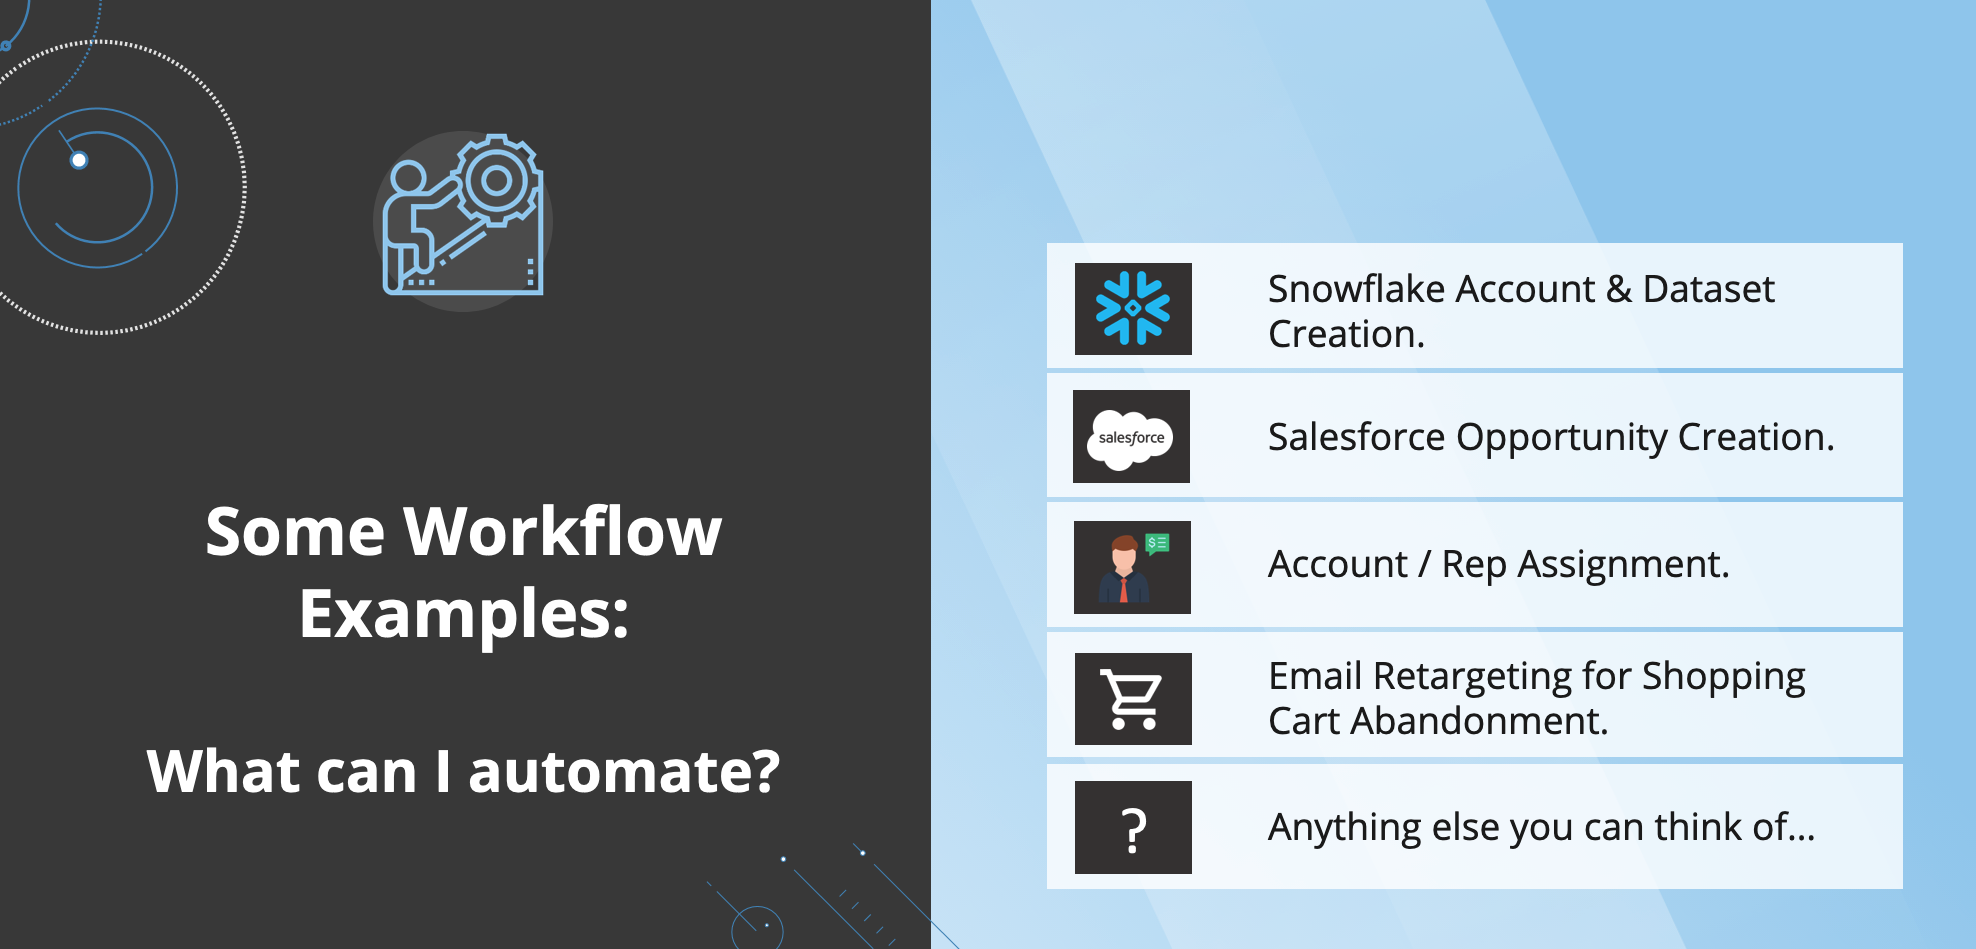
Below is a slide i sued the other week to highlight some of the other use-cases that I’ve been ceating workflows for…
Workflows is currently a beta feature in Domo (as of December 2023), so speak to your CSM if you’d like to give it a try for any use-cases you have in mind.
If you’re not a Domo user, we now offer a Freemium instance, so you can get your own Domo instance to try out with a set amount of credit per month completely free!
create your instance by going to this link: https://www.domo.com/start/freemium